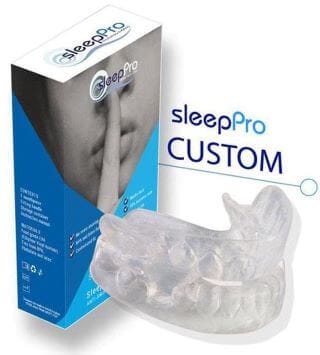
SleepPro Custom is the first device I’ve tested that is made in a lab – yet priced similarly to boil-and-bite anti snoring devices.
I was excited to try it out because I’ve always wanted a full impression product, which is what dentists sell. SleepPro Custom’s price is a tenth of what a dentist charges, and not much more expensive than SnoreRx.
In my research, I found that SleepPro manufacturer MEDiTAS Ltd has been selling snoring and mild sleep apnea since 1998. Their products are even recommended by British National Health Service (NHS).
In particular, the SleepPro Custom is recommended by specialists at Papworth Hospital in Cambridgeshire, England, a world-renowned sleep disorder center. They consider it the most affordable and successful stop snoring device on the market.
Research shows the SleepPro Custom stops snoring and is beneficial to health. Clinical studies also indicate that the SleepPro Custom is an alternative to CPAP for obstructive sleep apnea.
Made in A Lab for Perfect Fit
As the name suggests, this mouthguard is custom-fit in a lab. The process involves making an impression at home which you mail in.
Cost is more than a standard boil-and-bite product. However, it is well worth it because custom fit mouthpieces are comfortable – enabling better sleep and a higher chance of success.
SleepPro Custom is a professional product and equal to dentist mouth guards which can cost as much as $2,000.
If you already have a mouthpiece that works for you, such as a Zyppah, MEDiTAS Ltd. can use that, along with your impressions, to build your new Custom mouthpiece and make the protrusion of the lower jaw accurate.
My Results with the Sleep Pro Custom
I must say this is the highest quality MAD I’ve tested and using a lab to form my impression was a great experience. I had discussed a custom mouthpiece with a dentist in the past but was put off by the cost.
First of all, mandibular advancement devices work. They are proven to prevent snoring. By combining that success with a guarantee of good fit in the SleepPro, you have a winning product.
You can’t get any better comfort than the Sleep Pro Custom. I loved it right away – instead of trying to acclimate to a mouthpiece for weeks (and most people give up here), I had a form-fitting MAD that enabled me to sleep easily on the first night.
The form factor is very slight which means you can swallow easily and there is almost no adjustment period with this mouthpiece.
I would highly recommend the SleepPro Custom to anyone that who has had problems adjusting to boil-and-bite snore guards. This is a 5-star quality product.
Regular vs. Anti-Microbial
The Custom comes in regular or anti-microbial. I decided to try the regular first for a few months and test the antimicrobial later.
The antimicrobial includes a coating that makes the mouthpiece hygienic and keeps it fresher for longer by preventing bacteria growth.
This antimicrobial technology extends the life of the product while safeguarding the health of your teeth – all for a mere $22 more. You can read more about the Sleep Pro anti-microbial here.
First, Molding your Impressions
I have to admit this was my first time making full impressions, and after doing close to fifty boil-and-bite mouthpieces, I don’t mind telling you this seemed more daunting. However, I was pleasantly surprised by how easy the process was. I’ve included some pictures of the steps to show you what I mean.
SleepPro sends you an impression kit which consists of a couple trays and dental grade impression clay.
So, you start off like a normal boil-and-bite method. Add the white gum piece into boiling water for 15-20 seconds. Drain off the excess water, then quickly shape to your top gum line, before placing in cold water to set.
You get a ball of white putty and a ball of orange putty. Roll these pieces together until the two colors are mostly blended, then push the putty into your white mouthpiece (you have 45 seconds before it hardens). Throw away any of the excess putty.
Bite down on the putty in the white plastic tray. Holding the tray in the mouth for three minutes. Timing is really important here – I left one tray for longer than three minutes and struggled to remove the impression from my teeth! Also, follow the guide and bite in the middle section of the mold, as indicated by the green line.
You have to repeat the process for top and bottom.
If you go wrong, SleepPro is happy to send you more putty or replacement parts for the moulds, but you will have to wait for shipping from the UK, so try to get this right first time if you can.
Next, boil-dand-bite the included mouthpiece that is for lower jaw positioning. Find the comfortable position (its best not to go far forward with this). You want to err on the side of not too much jaw progression, otherwise, your jaws will feel tired and painful after 6-8 hours of nightly usage.
You can also send in a Zyppah or SnoreRx or similar appliance with your impressions, to demonstrate your jaw progression.
Once you have your impressions and jaw advancement, you mail them to the lab in the UK.
Shipping
Shipping is not ideal as your impressions are mailed to the UK, which takes time and costs extra. However, I cannot emphasize enough how cost-effective this process is when compared to a dentist ordered mouthguard.
It only takes a few days to receive the initial product from them. I had it shipped to southern California, and it was quick. You do have to pay to send the teeth impressions back to the lab, but this only cost me $14.
Customer Service
Customer service is also excellent! I had a few questions during the process, and SleepPro was happy to answer all my questions. They offer a full money-back guarantee.
Buy the SleepPro Custom Here for U.S. Customers.


